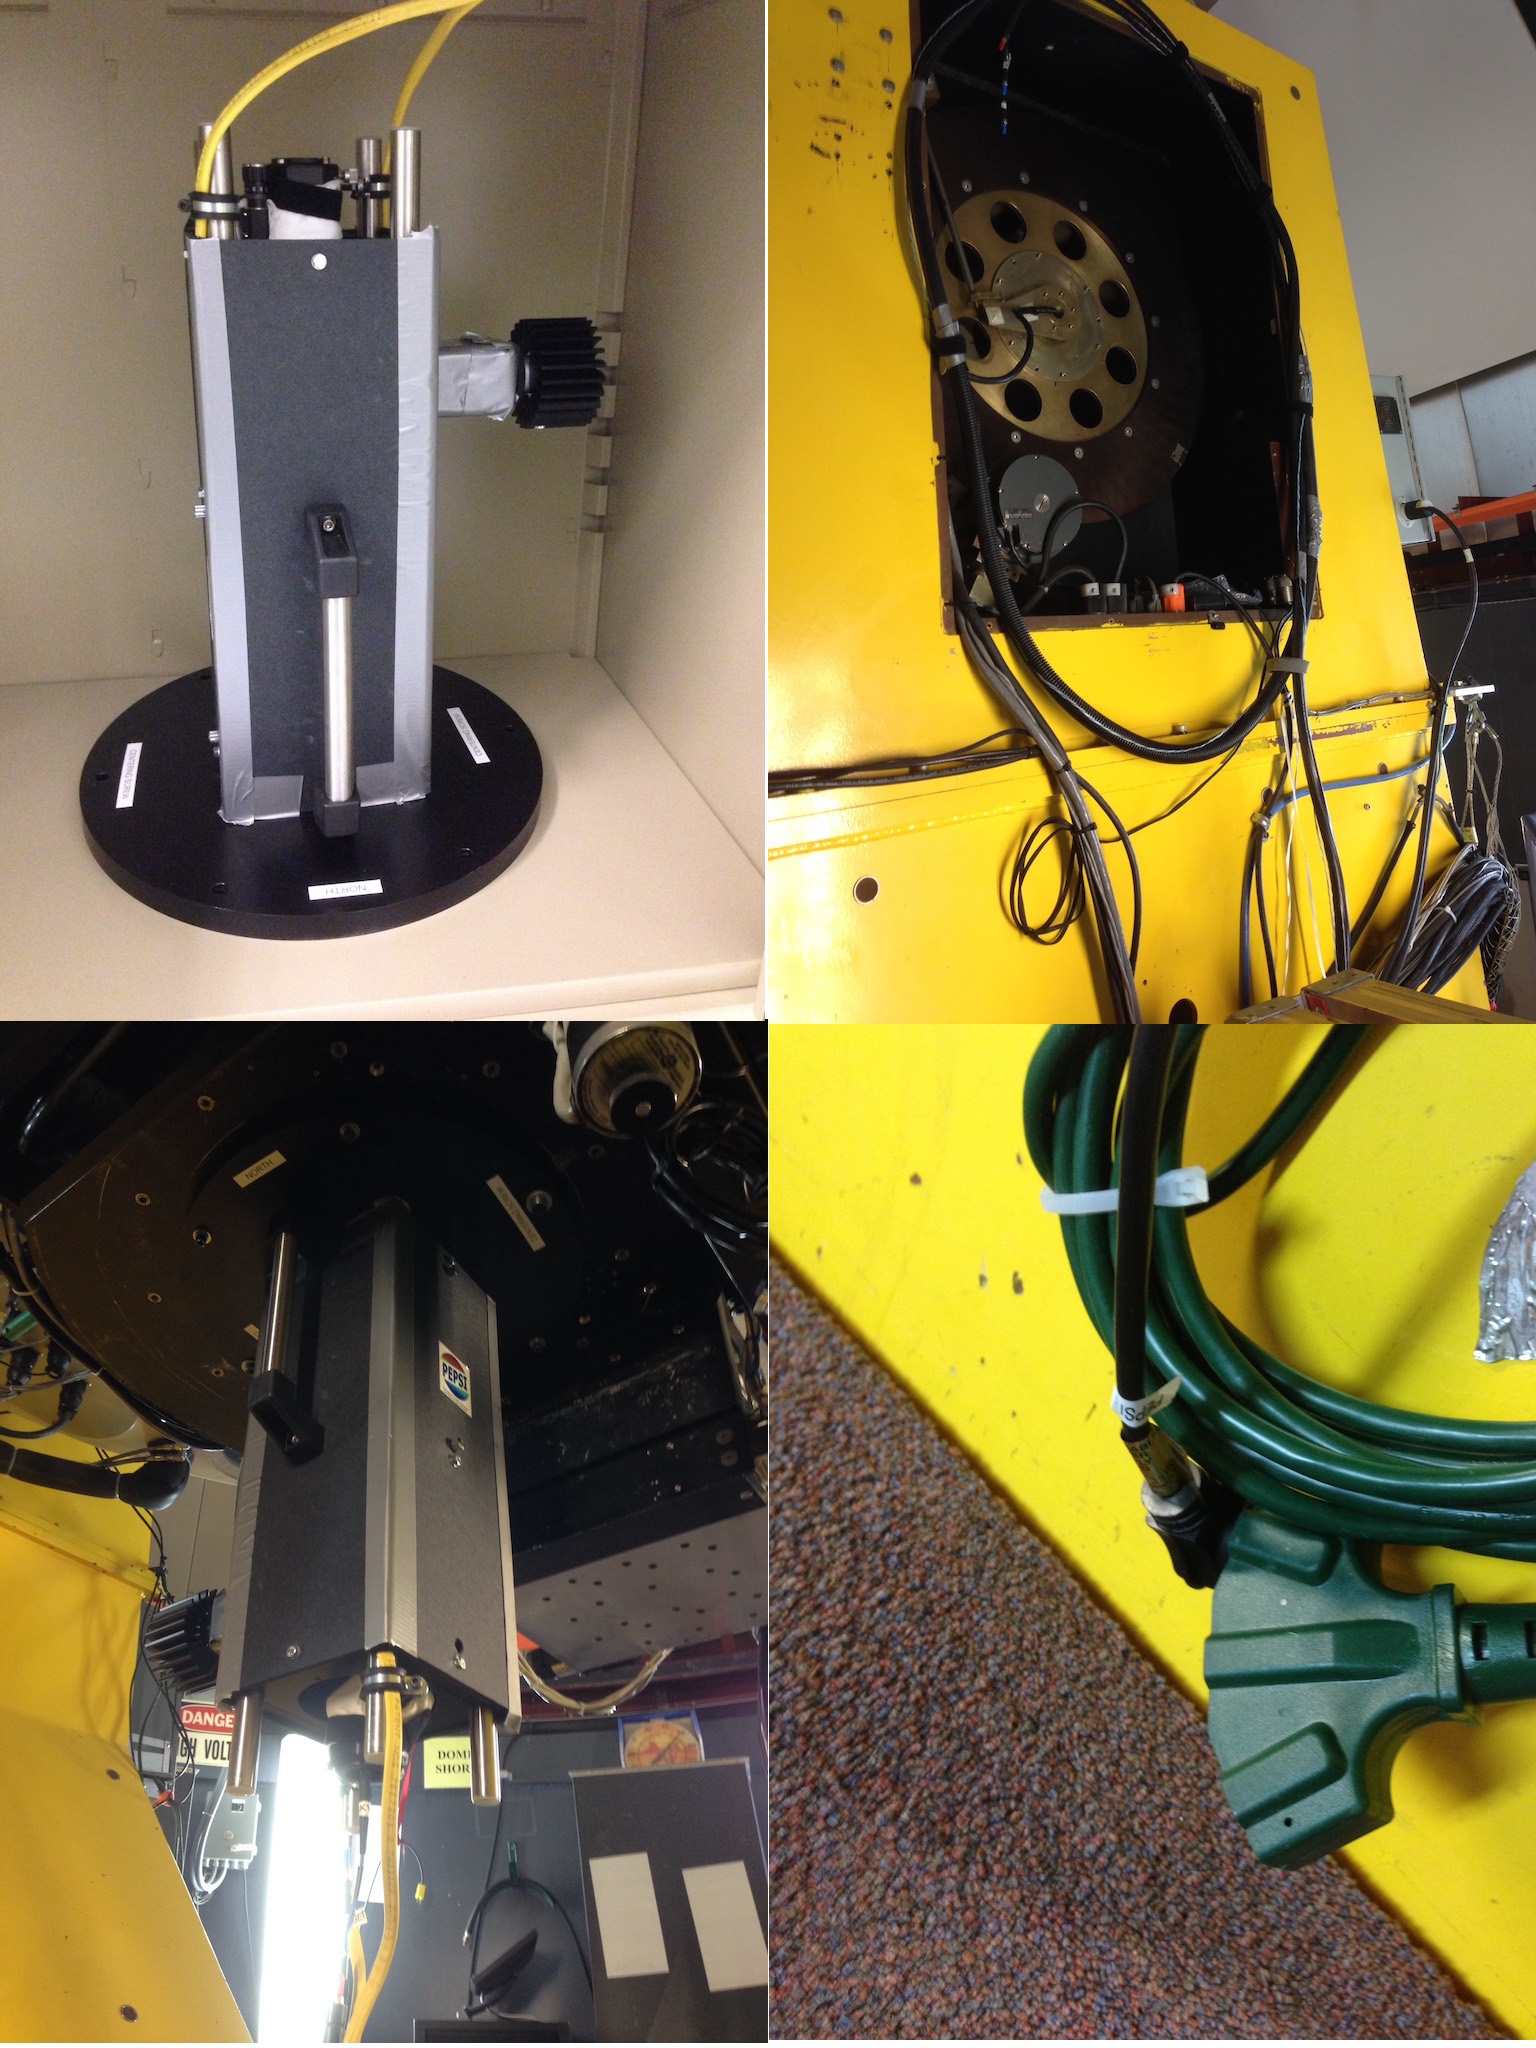
Storage location
The PEPSI-VATT adapter is stored in the cabinet in the PEPSI bay at the LBT. Together with the unit, you also need to get the mounting screws which should be in VATT toolbox next to it in the same cabinet.
The mounting screwas are 6 inch-threaded screws, 2 of which act as centering screw and need to go into the marked positions. The only tool needed is a 3/16 hex screwdriver. There is usually one available at the VATT, since it is the same size needed to mount/unmount the VATT-4k-imager.
Mounting the unit
You need two persons (ideally Michael Franz from the VATT should help) to lift it up underneath the telescope and put the mounting screws in. Please note the orientation, the label “North” should point towards the dome-entrance/hydraulic lift direction. The guiding camera should be at the left-hand side as seen from the dome entrance (see images below).

Connecting the unit
- There is a black ethernet cable in the cable wrap. Please connect that to the guiding camera.
- Make sure the PoE-injector is connected to power (at the electrical connector box on the fork of the telescope)
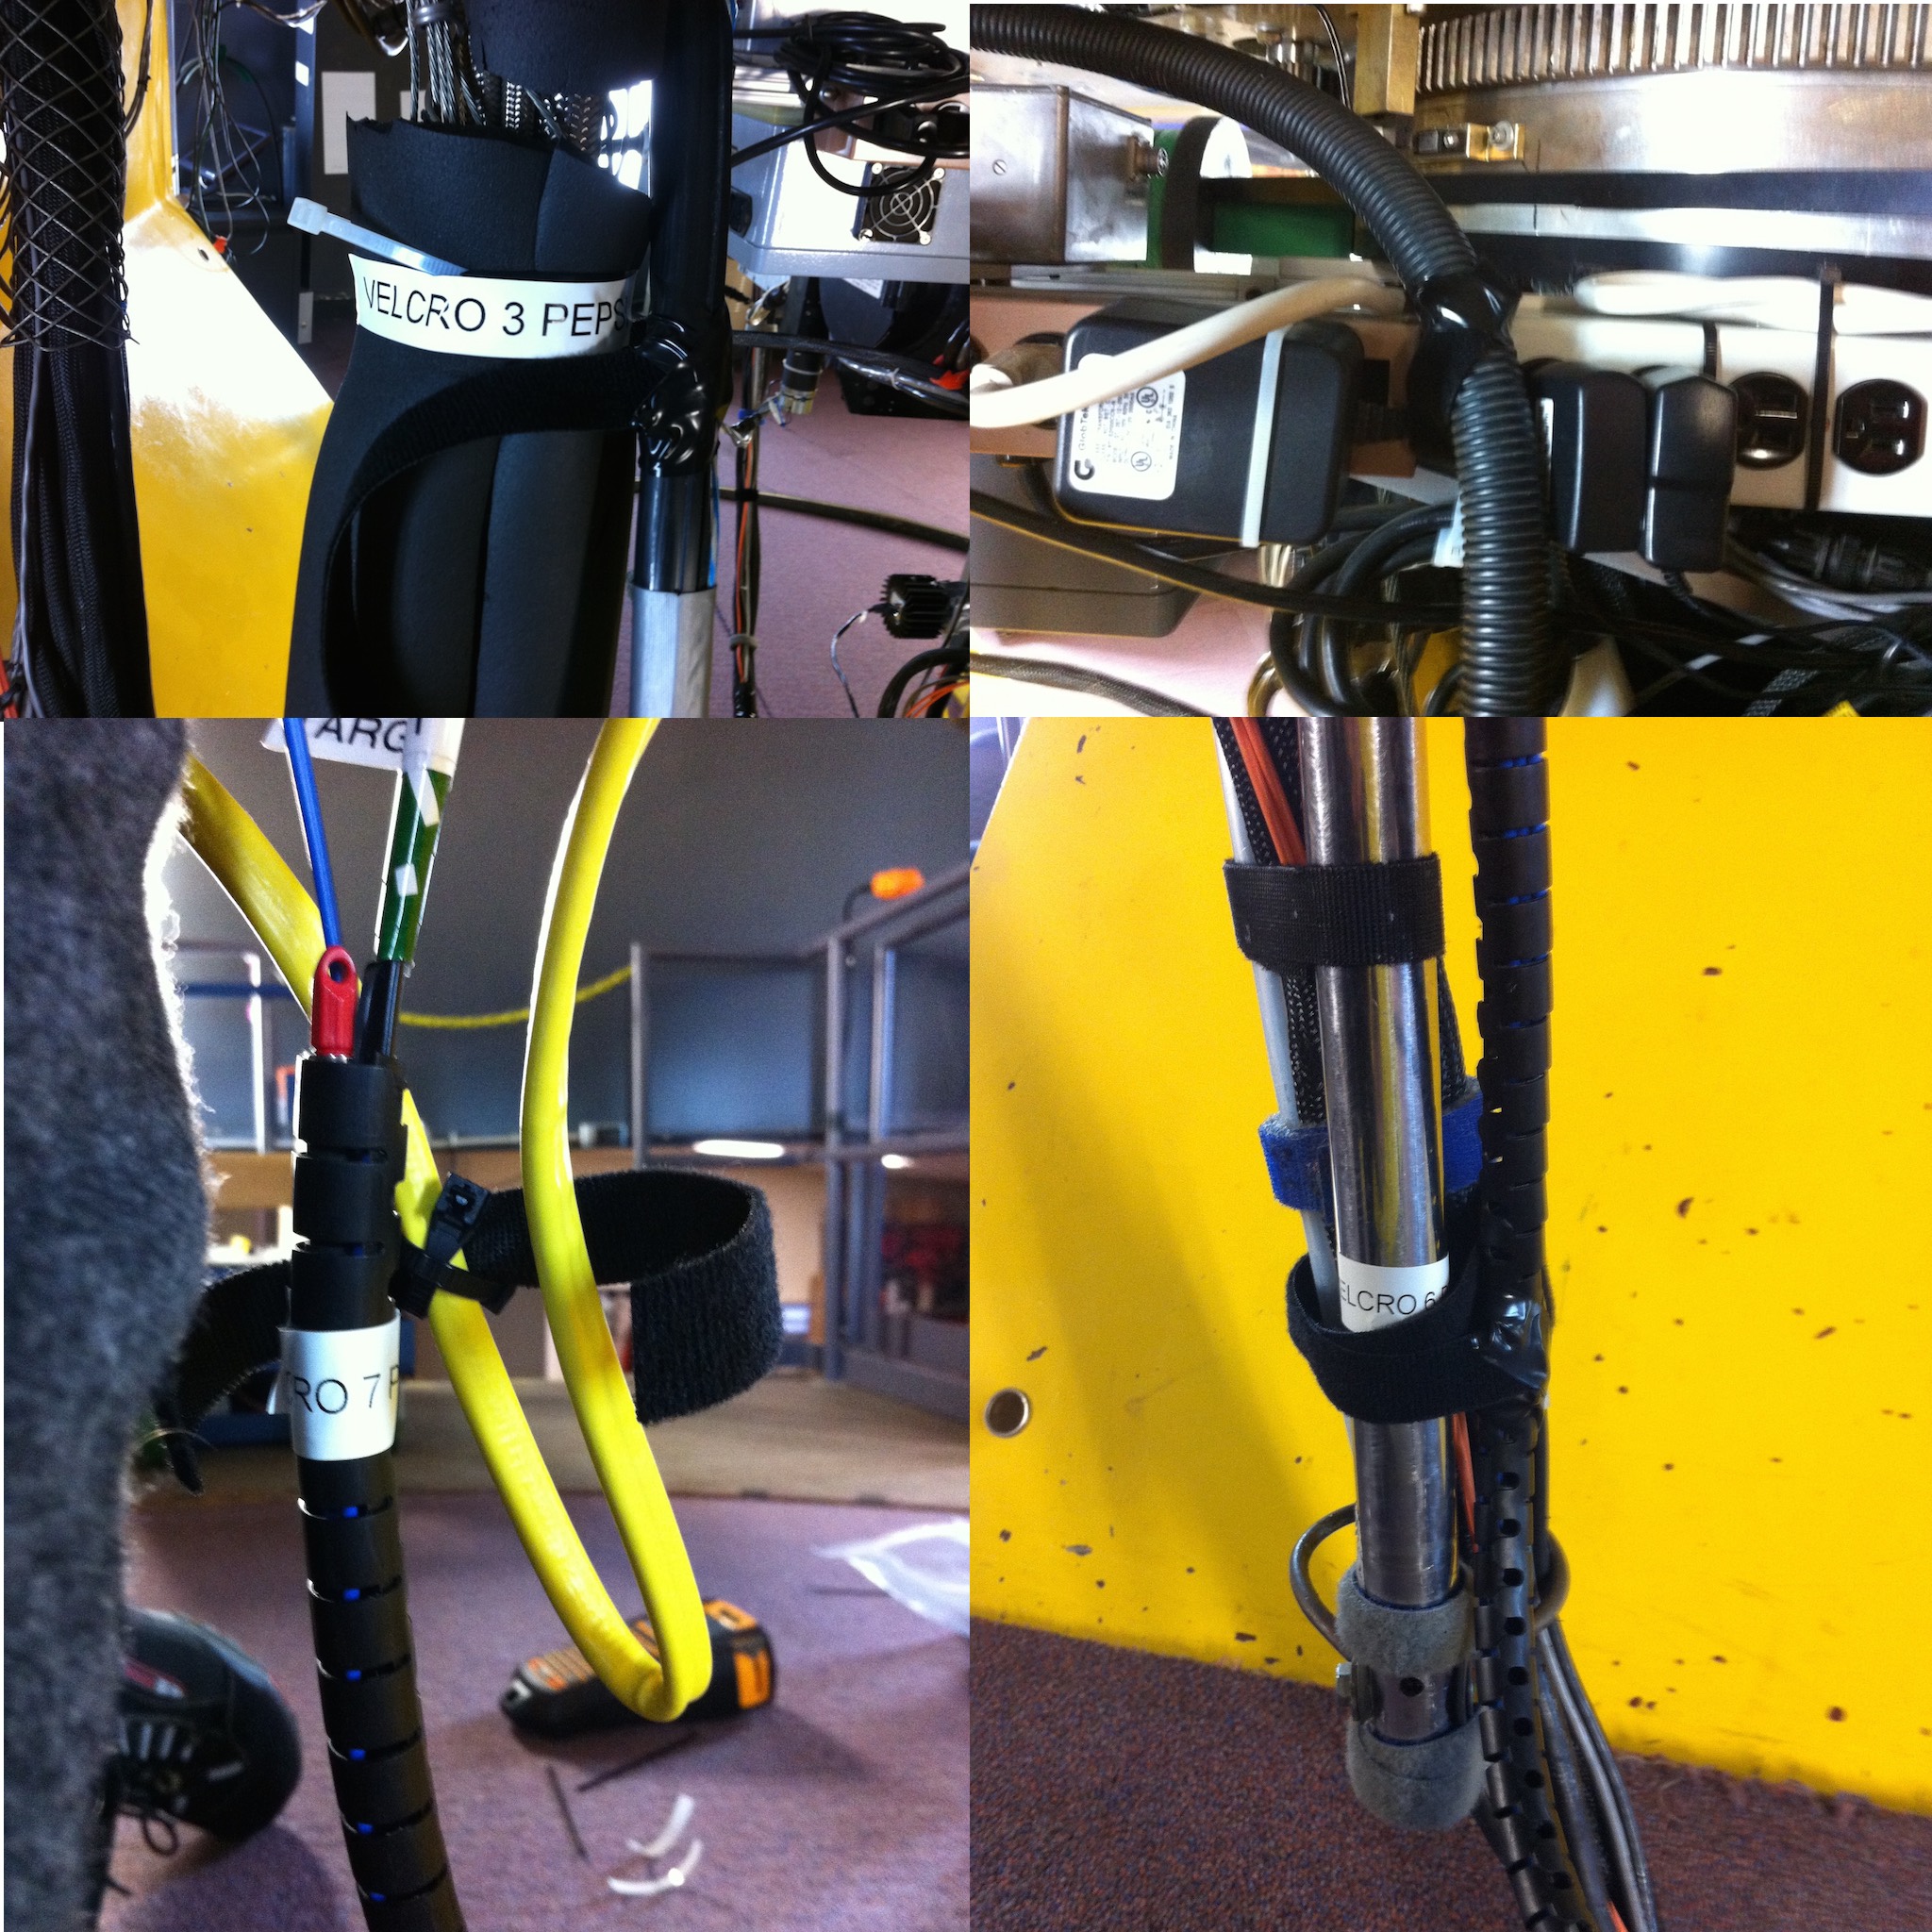
- Take the fiber bundle (it is coiled up in the elevation axis hole) and use Velcros to fix it to the cable wrap. The positions of those are marked (see image below).
- Choose the correct science fiber to connect to the unit. Usually this is the one labeled “Sky”. The third fiber is broken, use it to park the SMA-cap until you unmount the unit.

Hot-Spot position
Once guiding on the first bright star, make sure you fine-tune the hot-spot position in the VATT control GUI by looking at the fiber pinhole. Mounting/unmounting the unit can change this position by 10s of pixels.
